⏱ 3 min read
How to nail a magnetic gel (cat eye)
Center line, diagonal, glass bead or velvet: how the magnet works, which base to choose and the moves for a crisp effect.
The essentials in 30 seconds
- Magnetic gel, also called cat eye, contains thousands of tiny metallic particles.
- Bring a magnet close and you orient them: they behave like tiny mirrors and draw a line or a spot of light that moves as you turn your hand.
- 1. Prep and base as for any manicure (see the guide).
- 2. Background color: a black base gives the most contrast; a nude base or a jelly gives a softer result.
Contents
Magnetic gel, also called cat eye, contains thousands of tiny metallic particles. Bring a magnet close and you orient them: they behave like tiny mirrors and draw a line or a spot of light that moves as you turn your hand. It's the most spectacular effect in nail art… and one of the simplest once you get the move.
The principle in one sentence
The magnet tilts the particles; where they reflect light towards your eye, the nail lights up. Change the angle of your hand and the light glides across the nail.
What you need
- a magnetic gel (often over a black or dark base for more contrast);
- a magnet: a bar for a line, a round or spherical magnet for glass bead;
- an LED UV lamp.
The steps
- Prep and base as for any manicure (see the guide).
- Background color: a black base gives the most contrast; a nude base or a jelly gives a softer result.
- Shake the bottle: the particles settle at the bottom over time.
- Apply an even coat of magnetic gel, neither too thin nor too thick.
- Hold the magnet close without touching the nail, a few millimeters away, for 5 to 10 seconds.
- Cure immediately (30 s): if you wait, the particles scatter again and the effect blurs.
- Top coat: glossy for a deep effect, matte for a velvet finish.
The four effects
Center line
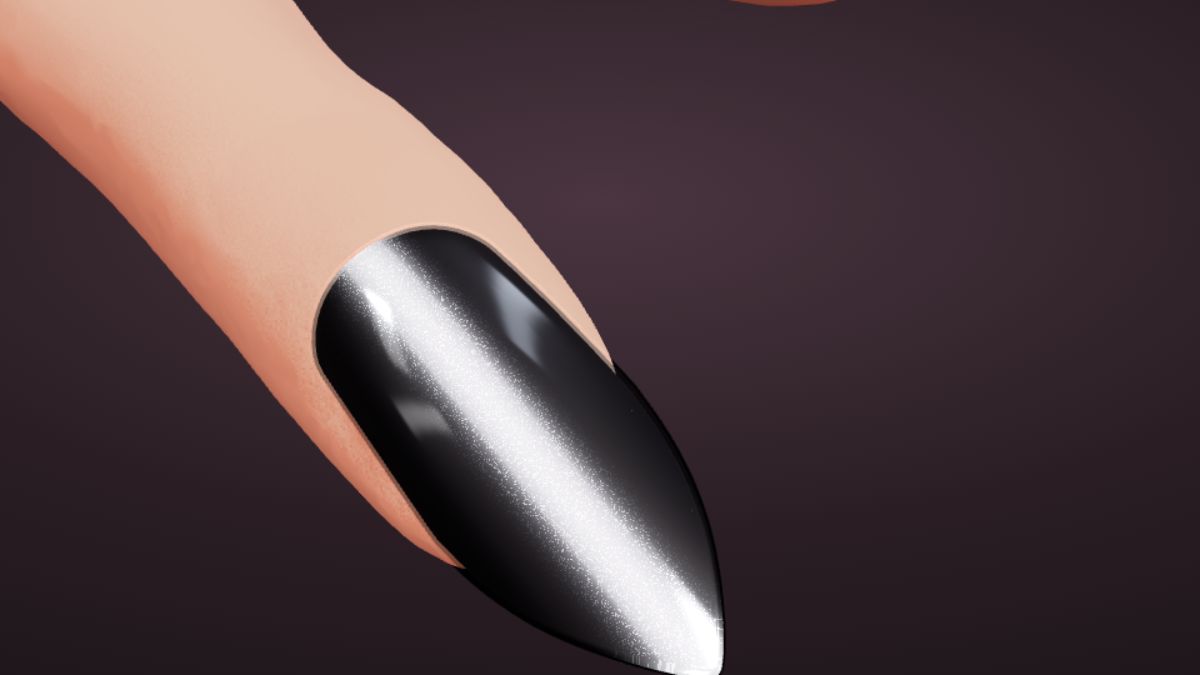
A bar magnet held parallel to the nail: the particles tip to either side of the axis and form a thin line of light in the middle. This is the classic cat eye.
Diagonal
Same principle, magnet held at an angle: the line crosses the nail diagonally. Very flattering on almond and ballerina shapes.
Glass bead
A round (or spherical) magnet placed at the center creates a ball of light that seems to float inside the nail, like a glass bead. The further away you hold the magnet or the longer you leave it, the wider and more diffuse the bead becomes.
Velvet
The magnet is swept quickly, from further away, over the whole surface: instead of a sharp line you get a wide, soft, satin glow. Gorgeous with a matte top coat.
The different magnets
Each magnet is made for a pattern. Its shape matters, and so does the way its poles are arranged: some tools glue together magnets that "repel each other" to sculpt the field.
| Magnet | What it looks like | Effect |
|---|---|---|
| Bar | long magnet | the classic line, straight or diagonal |
| Round (ball, cylinder) | round tip | ball of light (glass bead), curves around the nail |
| Square (block) | flat square tip | sharp lines, glowing edges, gradients, French tip |
| Heart | steel Y-shaped guide fixed to the end of a magnet (a paperclip bent into a V also works) | the heart appears between the branches in 10 to 15 seconds |
| Ring | hollow ring, often with a small square in the middle | halo (ring of light) or "black hole" (dark center) |
| Flower ("9D") | alternating north and south poles | petals, bursts, star |
| "Repelling" double head | two magnets that repel each other, separated by a small gap | particles gather in the gap: a very fine line |
The closer (2–3 mm) and stronger the magnet, the sharper the effect.
Classic mistakes
| Problem | Likely cause | Fix |
|---|---|---|
| Blurry effect, line spreading | Cured too late | Cure right after the magnet |
| No visible effect | Magnet too far or bottle not shaken | Shake, hold at 2–3 mm |
| Crooked line | Magnet held unevenly | Rest your elbow, keep the magnet parallel |
| Dull reflection | Matte top on a thin line | Glossy top for a crisp effect |
Try it before you start
In the 3D studio, add a “Magnetic gel” layer, choose the pattern (center line, diagonal, glass bead, velvet) and adjust the effect and glitter size. Then rotate the view: the light moves across the nail just like the real thing. To practice, choose the “Free magnet” pattern: a mini-game lets you move these real magnets over the nail.
How to nail a magnetic gel (cat eye)
Try it in the 3D studio